Shogun/Samurai Swords Manual
Vitas Povilaitis
Revision: December 23, 2017, added ninja to Inventory. (Thanks to Alessandro Piano for pointing it out.)
Revision: February 23, 2010, clarified naval attack and daimyo successful battle. (Thanks to Brian Hansen for pointing it out.)
Revision: September 14, 2003, clarified experienced daimyo movement. (Thanks to John LaBelle for pointing it out.)
Additional change: January 23, 2003, corrected army pieces count. (Thanks to Josh Buhl for pointing it out.)
Formatted for HTML
�
�
Table Of Contents
I.a. Bid for sword (turn order)
I.b. Buy castle or fortification
VIII.1. Phase A: Move Daimyos' Armies
VIII.2. Phase B: Declare First Battles
VIII.3. Phase C: Conduct Combat
VIII.3.5 Experienced Daimyo during combat
VIII.3.5.1 Daimyo army movement
VIII.3.5.2 Experienced Daimyo in combat
VIII.3.5.3 Moving a successful daimyo's experience marker
VIII.4. Phase D: Final Movement
X. Recover Assassinated Daimyos
Eliminating An Opponent From The Game
This document is meant to supplement the game play manual for Shogun/Samurai Swords. This document presents the rules in a logical and sequential manner, while retaining all the information from the original rules. Suggested optional rules are added where appropriate. This document drops all examples, Initial Assembly instructions, A Look at the Game Parts, and Rules for a 2-player Game. Also, it only references the Quick-start Game Rules as asides to the original rules. Refer to the original game play manual for complete information.
�
Actions which must be done in a specific order are presented as a numbered list (using Latin or Roman numerals.) Because two steps were inserted into the Action Sequence (Reveal Koku Allocation and Recover Assassinated Daimyos) to clarify what players should do, Roman numerals are used to distinguish this sequence, and the original Latin numerals are used for the titles of the original steps. Actions which may be carried out in any order are presented as a bulleted list or as a lettered list.
�
The wording for rules in the original manual about what could be done have been made stronger by changing occurrences of "can" and "cannot." Instead, this document uses "may" when a rule is at a player's discretion, and "must" and "must not" when a rule is in strict effect.
�
It is the 16th century--the Age of War in Japan. On the provincial battlegrounds, daimyo leaders draw up their armies. Samurai warriors don battle armor; peasant farmers take up spears and guns. For each ambitious daimyo, a lifetime of military training is put to the final test. Who will emerge victorious?
�
As a Japanese warlord, you lead your daimyos to victory--or defeat! Conquer provinces, then guard them while you conquer more. Each enemy, each battle, calls for a different strategy. Is brute military force enough? Will your opponent honor a truce line? Could a samurai ronin ambush or a sudden ninja strike pay off?
�
Whatever your strategy, each province you claim brings you closer to your goal. Gain enough provinces and you become Shogun--military ruler of all Japan!
�
Each player represents a 16th century Japanese Warlord commanding three generals, or daimyos. Warlords do no fight directly; they battle through the armies of their daimyos and their provincial forces. The goal of a Warlord is to become the Shogun of all Japan by controlling a certain number of the 68 provinces. A Warlord is eliminated from play when his three daimyos are eliminated.

�
�
|
Number of Players |
Number of Starting Provinces per Player |
Spearmen on board per Player |
Spearmen Left In Tray per Player |
Number of Empty Provinces |
|
5 |
13 |
25 |
11 |
3 |
|
4 |
17 |
29 |
7 |
0 |
|
3 |
22 |
34 |
2 |
2 |
|
2 |
34 (17 per color) |
58 (29 per color) |
14 (7 per color) |
0 |
�
�
�
�
�
�
�
Optional rule: the original rules say to draw swords and place units and armies (for steps 5 and 6) in sword order. Players may optionally use the honor system to place units and armies at the same time to speed this process along.
�
The official ways to win depend on whether you're playing a long game, a short game, a "quick-start" game, or a two-player game.
�
In order to attain the honorable rank of Shogun, you must increase the size of your domain by capturing provinces from your opponents.
�
The object of the "short game" is to be the first player to gain control of 35 provinces on the gameboard map.
�
Quick-start rule: Have the most provinces when the first player is eliminated. Note: the player who eliminates an opponent immediately owns all the eliminated player's provinces.
�
|
Number of players |
Number of provinces to win |
|
5 |
30 |
|
4 |
35 |
|
3 |
40 |
|
2 |
50 (for two colors combined) |
Alternate quick-start rule: A player must control a certain number of provinces at the end of a complete round of play in order to be declared Shogun:
�
�
Optional "long game" rule: Instead of checking for the victory condition immediately, check victory condition at the end of the round so that all players get their turns.
�
Players carry out each step of the Action Sequence at the same time, except for Action 7: Wage War which is carried out by players in sword (turn) order. The Action Sequence is repeated until the victory conditions are met.
�
If you hired the ninja during the previous round and didn't use him as an assassin, you may use him during this action to spy on one player's koku allocation before you allocate your own koku. Chosen player shows you his allocation (and must not change it.) You then allocate your koku.
�
All players secretly allocate all koku to any or all of the five planning bins as follows. To bid for something means you must have the highest bid to get what you want. To buy something means that you automatically get what you spend for as long as the resources are available.
�
All koku must be allocated during the planning stage; they must not be saved or loaned.
�
Player may allocate the koku in his TAKE SWORDS bin to bid for his turn order.
�
Player may allocate two (2) koku in his BUILD bin. Zero or two koku may be allocated to build a castle or to fortify an existing castle.
�
Player may allocate koku to his LEVY UNITS bin to buy. One koku buys:
�
�
Player may allocate koku in his HIRE RONIN bin to hire ronin. One koku hires two ronin.
�
Player may allocate koku in his HIRE NINJA bin to bid to hire the ninja for his turn.
�
All players reveal their koku allocation.
�
Players compare the koku in their TAKE SWORDS bins. Players who placed koku take the swords of their choice in order of most koku allocated; players who didn't, draw remaining swords at random. In the case of a tie for koku allocated, and if tied players want the same sword, tying players alone must draw randomly from their first and second choices.
�
Players who didn't bid for a sword draw from the remaining swords randomly from a closed fist.
�
Players who allocated 2 koku to their BUILD bins buy and place either 1 castle or 1 fortification base. A player must build only one castle or upgrade one castle to a fortress by adding a fortification base per round of play. Castles may be placed in any friendly province, one to a province. If there are not enough castles or fortresses to go around, they are purchased in order of swords drawn. Players unable to build lose their two koku. Castles and fortresses may be captured, but must never be destroyed or moved.
�
Players who allocated koku to their LEVY UNITS bins buy and place reinforcement units from their planning trays. You must placeonly one levied unit per province, and placing the unit in an army counts as placing it in the province the army is in! Therefore, you must never levy more units than the number of provinces you own. If you run out of a particular unit in your planning tray, you may not levy more of that unit until some are returned to the tray as casualties.
�
For each koku allocated, player may levy:
�
�
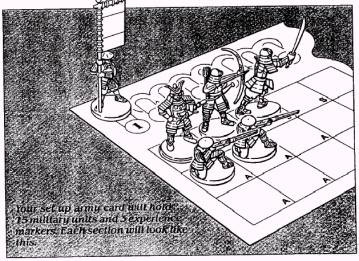
When placing units in an army, throughout the game, your daimyos willalways stay on their "D" squares on your army card unless they are lost in battle. Samurai units (bowmen and swordsmen) arealways placed on the "S" squares, and ashigaru units (gunners and spearmen) are always placed on the "A" squares. An army must never hold more than the daimyo, four samurai units and 10 ashigaru units.
�
Players who allocated koku to their HIRE RONIN bins buy two ronin units per koku and secretly deploy them. Until they attack, defend or move, the exact ronin locations remain a secret from opponents. You may split up hired ronin to one or more provinces; you may decide the ronin will join the army or the provincial force.
�
Placement of ronin is done in secret; the ronin are placed on top of the corresponding face-down province card.
�
Remember that ronin units must not move or fight by themselves; they must be accompanied by the army or the provincial force they joined. Player must always be sure there is still at least one more regular unit in the army, or one more regular unit in the provincial force or two more regular units in the army and provincial force combined, than the number of ronin present.
�
In the unlikely event that there aren't enough ronin in the master tray for all players who need them, players hire ronin in the turn order indicated by their swords. Any players who aren't able to hire ronin lose their koku to the master tray.
�
Optional Rule: To clarify exactly where ronin will appear while maximizing surprise, have the player write the name of the provinces, the number of ronin, and whether the ronin are part of the army or the provincial force on a scrap of paper and place all hired ronin atop the paper.
�
Players compare the koku in their HIRE NINJA bins. The player with the most koku buys the service of the ninja as described in the section Use Ninja. In case of a tie for the most koku, no one hires the ninja! Place the ninja figure in front of the Player who hired him until he is used. A player doesn't need to decide right away which service (if any) he'll use; player may hire the ninja only to prevent another player from hiring him. Player doesn't reveal the ninja's mission until player is ready to use him! Refer to the Use Ninja section for more information.
�
In the turn order indicated by his sword, each player completes the entire 4-phase Wage War action. The player whose turn it is referred to as the attacking player. There are five critical concepts/terms involved in various phases of the Wage Waraction: battle, successful battle, ownership of provinces, garrisons and daimyo experience. All are explained briefly here:
�
Attacking an opponent's province or an empty province with an army or provincial force is called a battle. First battles are indicated by battle markers. Subsequent battles by experienced daimyos are not indicated by battle markers, but are announced after their first battle is completed.
�
Eliminating an opponent's forces in a province is called a successful battle. Success in battle is only considered during an attack (not defense.) When this happens, a daimyo's experience marker moves one hole to the right a maximum of once per round, and the province card is placed on the red gameboard rectangle.
�
The following do not count as successful battles:
n Attacks against empty provinces
n Attacks that were called off
n Attacks that were unable to be made because of a previous successful battle
�
Provinces are adjacent if they share a common border; provinces which meet at a point are not considered to be adjacent. A friendly provincecontains at least one of your military units. You own the province; you hold the corresponding province card. An enemy province contains at least one military unit of an opponent. This opponent owns the province; he holds the corresponding province card. An empty province is unowned and contains no military units because no player has moved in to take it. The province cards for these provinces should be placed in the red gameboard rectangle.
�
You must not leave a province empty when you move out; you must leave at least oneregular unit behind as you move. Units left behind for this purpose are provincial forces called garrisons.
�
This represents the knowledge and status a daimyo achieves with success in battle. A daimyo's experience is charted on your army card by its matching experience marker. A daimyo is considered an experienced daimyo when its experience marker is at the "2" or beyond. At the end of Phase C: Conduct Combat, if at least one battle a daimyo fought was successful, move the matching daimyo experience marker one hole to the right. (If that army fought more than one successful battle, the marker still moves only one hole per round.) A daimyo whose experience marker is moved up to the next level (e.g., from 1 to 2) must not attack again on this round; but its movement capability is increased in Phase D: Final Movement of this round.
�
Attacking player reveals his ronin if they're deployed in a daimyo's army that's moving. Turn provincial card faceup, then place ronin units with the army (on army card.)
�
The attacking player may move each army from a friendly province up to a number of adjacent friendly provinces in this phase equal to the daimyo's experience level.
�
The army must break off some units to become garrisons in a province that would be left empty. Provincial forces must not move in this phase. The attacking player must not split off army units for any other reason in this phase.
�
In addition to breaking off units to become garrisons, an army may also pick up units of provincial forces in provinces in moves through, and add those units to the appropriate squares on the army card.
�
Note that an army may pass through a province occupied by another one of attacking player's armies. Or it may move into and remain in an army-occupied province, as long as the other occupying army is, in turn, moved out. When moving two armies this way, never exchange units between them.
�
The attacking player must declare which adjacent enemy provinces or adjacent empty provinces he plans to attack, if any, by laying down battle markers pointing from the attacking province. Battle markers are removed during Phase D: Final Movement. The second and subsequent battles of experienced daimyo are not declared.
�
Alternate Rule: "attacks" on empty provinces do not have to be declared, they are simply occupied during Phase D: Final Movement. Exception: if moving through an empty province is the first move of an experienced daimyo duringPhase C: Conduct Combat, that "attack" must be declared as a first battle.
�
Special First Round Rule: During the first round of the game, the attacking player must not declare a battle against an enemy province occupied by an army.
�
A double-troop province is a province occupied by one army and one provincial force. If the attacking player declares a battle from a double-troop province, the player may attack with either troop, or with both. If both troops attack, they may attack separate adjacent provinces, or attack the same province. If they both attack the same province, the two battles are waged separately. When placing battle markers, the attacking player must state what troop is attacking where.
�
The attacking player may declare multiple battles against the same enemy province from two or more troops. These battles must be fought separately. All declared battles must be followed-through if the enemy remains; they may not be called off beforethey are begun.
�
All battles declared must be begun. The attacking player conducts combat one battle at a time in the order of his choosing. All units in the attacking army or provincial force must take part in the battle. The defender always defends withall units (in both provincial forces and army) in the defending province.
�
Rule clarification: Armies with multiple-attacks must resolve all their attacks before moving on to the next battle. Beyond this, the battles are handled in whatever order the attacker wishes.
�
Players reveal their ronin if they're deployed in the attacking provincial force or army, or if they're deployed in the defending provincial force or army. Turn provincial card faceup, then place ronin units with the provincial force (on gameboard) or army (on army card.)
�
As a defender, a player has an advantage over the attacker if certain provinces are attacked. The rules here explain these special defender advantages.
�
As the defender of a province being attacked by sea by a naval invasion, defending units have first-strikeadvantage. This means that defending units follow all the steps of the Combat Sequence for one round before the attacker can fight back! (Units from castles and fortresses do not participate in the first-strike.)
�
Rule clarification: The correct rule is that after defending units fire during a naval attack, a normal combat round follows.
�
A defending province with a castle gets four additional spearmen for each battle conducted at a battle marker. A defending province with a fortified castle gets five additional ronin for each battle conducted at a battle marker. These units are refreshed when an attacking player first attacks the province with a castle or fortress. At the end of the attacking player's turn, all players remove their remaining additional units. (Alternate rule: additional units are refreshed at the beginning of each battle and removed at the end of that battle.) These are virtual units, and players don't need game parts to represent them if there's not enough in the game trays. (Rule clarification: the official rules don't specify that the castle spearmen are virtual as it does about the fortified castle ronin, but it only makes sense that this would be true.) These units are the first to be eliminated when casualties are taken.
�
|
Type of additional defense |
Additional units available for defense |
|
Castle |
4 Ashigaru spearmen |
|
Fortress |
5 Samurai ronin |
�
Combat is resolved by die-rolling: one die roll for each battling unit. Attacker and defender roll for each unit type simultaneously. Consult the Combat Sequence Chart.
|
Players roll dice simultaneously |
Die roll (or less) needed to hit |
First, long-range weapon units battle. |
|
6 |
� |
|
4 |
� |
|
� |
� |
|
6 |
� |
|
5 |
Then, hand-to-hand combat units battle. |
|
4 |
� |
|
� |
� |
|
� |
� |
�
Important points: Remember to remove casualties of ranged weapons before conducting hand-to-hand combat. Each player who suffered casualties chooses which of his own units to remove. The player who scored the hit(s) never removes his opponent's casualties. Players must choose casualties from units involved in the battle only. They may choose units which have already rolled, or units which haven't rolled yet. Any player battling with an army must choose the daimyo as the last casualty to be removed. In a defending province occupied by a castle or fortress, remove bonus units as casualties first. Also remember to keep more regular units than ronin after removing any casualties. The ronin defenders in a fortress do not count as ronin that are purchased.
�
The attacker may call off the battle only at the end of any complete combat sequence. (After calling off a battle, an experienced daimyo's army may be able to attack again in another location.) Otherwise, a battle ends when all defending units are eliminated or all attacking units are eliminated. This will leave the defending or attacking province empty for the moment, so the corresponding province card must be placed in the red rectangle on the board.
�
Movement into/through one or more adjacent empty provinces is permitted during this phase by an experienced daimyo's army (these counts as attacks, but not as battles for experience purpose). Movement into any adjacent empty province is permitted during Phase D: Final Movement, by any army or provincial force unit or units.
�
A provincial force or an army led by a level 1 daimyo may only make one attack and must not move at all during combat Phase C: Conduct Combat. An experienced daimyo may make additional attacks and may even move between battles in this phase:
�
Any army may make a number of attacks less than or equal to its daimyo's experience level. Additional attacks are not declared by battle markers.
�
Between each attack, the army may move into the newly-defeated province and make its next attack from there. When an army enters a newly-defeated province, conquer it by taking the matching province card from the red gameboard rectangle and add it to your pile.
�
Here are three situations that arise during combat for an experienced daimyo's army:
�
A daimyo that has made a number of attacks equal to his experience, must remain where it is until Phase D: Final Movement. However, a daimyo that has made a number of attacks less than his experience, may make at least one more attack must do any one of three things:
n move into the newly-defeated province and make another attack from there
n move into the newly-defeated province and remain there until Phase D: Final Movement (Note that this rule was introduced in the Samurai Swords rules. The original rules stated that expereinced daimyos may only move between attacks in this phase.)
n remain where it is until Phase D: Final Movement
�
Important clarification: Though not specifically stated, it is assumed that the army can also split them off as a garrison during this phase. Forming a garrison would be the only reason army units could be split off. Garrisons formed during this phase could not, of course, attack, since no battle could have been declared in Phase B: Declare First Battles as these units did not technically exist at that point. Additionally, the army cannot pick up units from provinces. The only time an army can pick up provincial force units is when it moves into a new friendly province in Phase A or D (or when provincials move into the army's province in Phase D.)
�
If the experienced daimyo's army has attacked an empty province and may make at least one more attack, it must do one of two things:
n move into the empty province, conquer it and attack from there
n move in and wait for Phase D: Final Movement
�
Even though there were no defenders, this action counts as one battle, but does not count as a successful battle for experience purposes.
�
If the experienced daimyo's army calls off a battle, this unfinished battle still counts as one attack, but not a successful one. The army may attack elsewhere if its experience level permits.
�
After an army conducts all of its battles, if at least one battle was successful, move the matching daimyo's experience marker one hole to the right.
�
If an army fought more than one successful battle, the marker still moves only one hole per round.
�
A daimyo whose experience marker is moved to the next level (eg. from 1 to 2) cannot attack again on this round, but its movement is increased in Phase D: Final Movementof this (and subsequent) round(s).
�
During Phase C: Conduct Combat, a player may eliminate an opponent's daimyo in any of three ways.
n By eliminating it as the opponent's last casualty in a province
n By eliminating the opponent's entire army after its daimyo has been assassinated
n By assassinating the opponent's daimyo if it is the last unit in its army
�
If a player loses his last daimyo, he is out of the game. See the sectionEliminating An Opponent From The Game for more information.
�
The attacking player may move any or all of his armies or provincial forces. During this phase, an army or provincial force must move only into an adjacent empty or friendly province. Remember that sea lines make provinces adjacent. Also remember that the attacking player must not leave a province empty by moving everything out of it.
�
Player reveals his ronin if they're deployed in the provincial force or army that's moving. Turn provincial card faceup, then place ronin units with the provincial force (on gameboard) or army (on army card.)
�
Surviving Ronin Units: Since ronin units are not removed until Action 8: Remove Ronin, the Limit of ronin units per provincial force/army rule still applies. The attacking player must not violate this limit as he moves his armies or provincial forces. Ronin units alone cannot garrison provinces you move out of!
�
Order of movement: The attacking player moves his armies first, then moves his provincial forces. This is an important clarification: Just as double-troop battles are fought separately, movement occurs separately. It is not possible to co-ordinate movement so that a provincial force unit moves in to fill an empty province left by a departing army; the army must leave a garrison behind since it moves first. The garrison must not then move again, since it moved with the army; but during the next turn, the garrison is treated just like any other provincial force and may move and attack accordingly.
�
Armies may again move a number of adjacent provinces equal to or less than the daimyo's experience level. All attacking player's armies move simultaneously. Armies may pick up units and split off garrisons just as they could during Phase A: Move Daimyos' Armies (and, for experienced daimyos, Phase C: Conduct Combat). Armies may now move into any adjacent empty province to conquer it. Remember to leave garrisons behind where needed.
�
After the attacking player moves his armies, he may move his provincial forces, or any number of units from them, into adjacent friendly provinces or empty provinces. All attacking player's provincial forces move simultaneously. If the adjacent friendly province is occupied by an army, any or all of the provincial force units may be added to the army, as long as they fit on the army card. The units of a provincial force may split up to move into different adjacent empty or friendly provinces. If the adjacent friendly province is occupied by a provincial force, a larger provincial force results. Make sure there is never more than five regular units in a provincial force. If a provincial force unit moves into an adjacent empty province, it conquers it and the attacking player claims the province card from the red rectangle of the game board..
�
At the end of this phase, return battle markers to the master tray.
�
This is a good time to check if Victory Conditions have been met.
�
All players remove any surviving ronin units from their provinces on the gameboard, their army cards or their facedown province cards. All players do this at the same time.
�
Return the ronin units to the master tray. Ronin may be hired again during Action 5: Hire Ronin, on the next round of play.
�
For all players, if at least one unit of the assassinated daimyo's army survived combat; appoint the daimyo's successor by removing a unit from the army and returning the assassinated daimyo and his army marker to their standing positions. Return the experience marker to the beginning level of experience. The beginning level of experience is "1,"but is "2" for the quick-start rule.
�
Alternate rule: the unit promoted to be the new daimyo must be a samurai swordsman or bowman, in that order of preference, never an ashigaru. If only ashigaru remain, the army is disbanded and the ashigaru are added to the provincial force if room exists; excess ashigaru are lost.
�
Each player counts the number of provinces he owns, and gets one koku for each three provinces controlled, dropping remainders. A player gets a minimum of three koku.
�
This is a good time to check if Victory Conditions have been met.
�
There is a special black figure representing the ninja. The ninja may be hired for one round of play by being the highest bidder. The ninja may perform one of two services: either to attempt the assassination of an opponent's daimyo on the current round of play (on a roll of 8 or less); or to spy on an opponent's plans at the beginning of the next round of play (automatic). If the ninja fails in an assassination attempt, your opponent gets a free attempt to use the ninja to assassinate one of your daimyos (success on a 9 or higher.)
�
Special First Round Rule: Daimyo assassination attempts are not permitted on the first round of play. If you hire the ninja on the first round of play, you may only use him as a spy during Action 1: Plan of the second round.
�
The ninja assassin may announce one strike on any opponent's daimyo at any point during Action 7: Wage War on the current round of play. Assassination attempts are resolved as described above. If a daimyo is assassinated, turn the assassinated daimyo unit on its side on your army card. Then turn the matching army marker on its side in the game board province.
�
The assassinated daimyo cannot move, attack or defend for the rest of the current round. During that time, its army is "disrupted": they cannot move or attack; but when attacked, they must defend. At the end of the current round, if at least one unit of the assassinated daimyo's army survived combat; appoint the daimyo's successor byremoving a unit from the army and returning the assassinated daimyo and his army marker to their standing positions. Return the experience marker to the beginning level of experience.
�
If the daimyo's entire army is eliminated in battle, the daimyo is out of the game. This is true whether or not the daimyo was assassinated by the ninja, or was removed as the last casualty of battle (the daimyo must always be chosen as the last to be killed). If a Warlord loses his last daimyo, he is out of the game.
�
If you don't use the ninja as an assassin, you may use him as a spy on the next round of play as described above.
�
If you are the player to eliminate an opponent's last daimyo, the opponent is out of the game, and you instantly own all of his units and provinces. You also recover any daimyos you previously lost. You do not recover the lost daimyos of the player you defeated. Three daimyos is the most you can ever have.
�
The following rules apply when you eliminate an opponent from the game.
�
�
After eliminating an opponent from the game and taking control of his units and provinces, count your new total of provinces. This is a good time to check if Victory Conditions have been met!
�